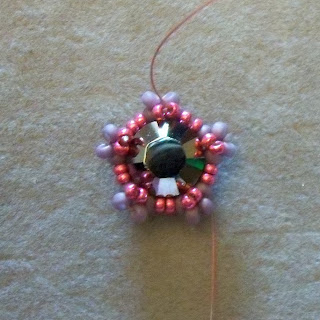
To make a Friday Flower, you will need... an 8mm chaton (ss39), and seed beads in sizes 11 and 15 (just a gram or so of each), plus beading thread, needle and scissors.
 Start off with about a metre of thread, thread the needle and pick up 10 size 11 seed beads (called A beads from here on in). Go through all the beads again to make a circle, and then the next 2 A beads to close the circle nicely.
Pick up 2xA then go through the next two A beads in the ring. This is the start of a stack of herringbone.
Repeat for a total of 5 times to make 5 herringbone stacks, and step up through the first bead added in the step above.
Pick up 2xA, go down through the next bead. These beads will sit in a pair above the start of your first herringbone stack.
Pick up one size 15 seed bead (a B bead), and go up through the first bead of the next herringbone stack.
Repeat all the way around, making herringbone stacks with A beads, and B beads between the stacks. Step up at the end so that your thread is exiting from the top of your herringbone stack.
Pick up 2xA, and go down through the next bead in the herringbone stack - this stack will now be three pairs of beads tall (not including the beads from the original circle of beads).
Pick up 2xB, go up through the next A bead on the next herringbone stack round.
Repeat this all the way around - adding 2xA onto the stacks and putting 2xB between the stacks. Pull this round quite tight, and your beadwork will begin to form a cup-shape.
Step up at the end of this round, but instead of exiting the top bead of a herringbone stack, come out of the second bead down.
Go through the pair of B beads between the stacks, and out of the second level A bead in the next stack.
Repeat the above step all the way around the beadwork, and step up with your thread coming out of the first B bead added.
Pop your chaton in the beadwork,make sure it is sitting straight, and that the top edges are BELOW your pairs of B beads added in the previous step.
Pick up one B, and go down through the next B to make a little picot shape.
Pick up 2xB and go up through the next B bead. Pull your thread tight - it is this round that will hold your chaton in place.
Pick up 7xA and go down through the next bead on the NEXT herringbone stack. Step up by going UP the next bead in the same stack.
Repeat adding petals of 7xA beads around the bezel. Step up at the end of the round by going up through the first bead of the first petal.
Next, use peyote stitch to work around the petal. Pick up 1xA, miss 1A, and go through 1A. Repeat this for a total of three times. Work your way around to the next petal.
Repeat around the flower. Step up so that your thread is exiting from the first A bead added in the first petal.
Finish off the petal by picking up 1xB bead, go through the next A bead. Pick up 3xB, go through the next A. Pick up 3xB, go through the next A. Pick up 1xB, go through the next A. Step up into the next petal by going through the first A bead of the next petal.
Repeat all the way around the flower, then weave in your thread ends and trim them off.
I'd love to hear what you think of this little pattern, and what you make with your flowers! You're welcome to sell anything you make using this pattern, but please do not reproduce the pattern or teach it. Please credit me (Becs Dean) as the designer, or give a link to my blog.


