A. Half tila beads (6 per flower)
B. Size 11 seed beads 3g
C. Size 15 seed beads 1g
D. ss39 (8mm) chaton (1 per flower)
E. 3mm fire polish beads (2)
F. 4mm bicones (12)
G. Miyuki 6mm sender bugles (8)
H. Kite bead (2)
I. Length of chain, jump rings and a clasp
Beading mat, beading needle - I use Miyuki needles, beading thread (I like 4lb fireline, especially as this
project has crystals and bugles in it), scissors or a threadzap, pliers for opening and closing jump rings.
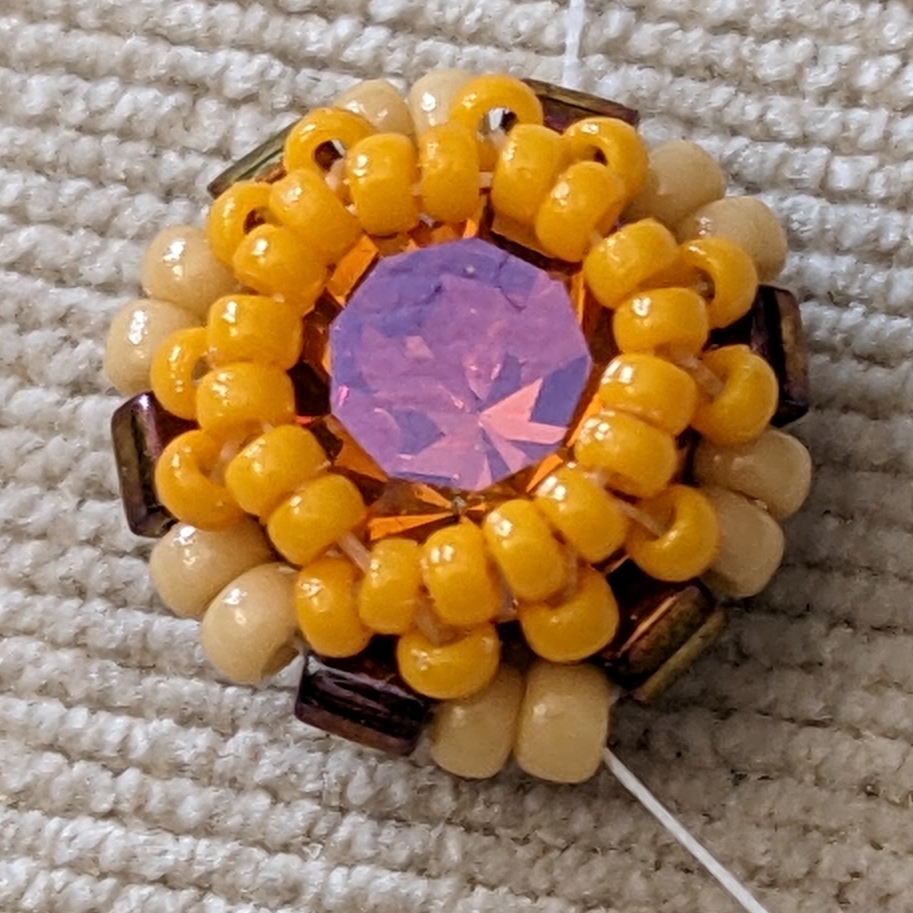
To make the necklace you need three flowers, but these little daffodil flowers (or stars if you make them in different colours) would make fabulous earrings - just thread a jump ring through one of the petals and then attach that to an ear wire.
1.
Pick up 6(A) and tie into a
circle. Go through the first (A) again.
2.
Pick up 1(B), go through the
next (A), repeat five more times adding a total of 6 (A) beads. Step up by
going through the top (unused) hole in the (A) bead your thread is exiting.
3.
Pick up 2(A), go through the
top hole in the next (A) bead. Repeat five more times adding a total of six
lots of 2(A) bead. Step up so that your thread is exiting from the top hole of
an (A) bead.
4.
Pick up 3(C) beads, go back
through the hole in the (A) bead and through the next 2(B) beads. Repeat five
more times adding a total of six groups of 3(C) beads. Step up by exiting from
the middle (C) bead from the last group added.
5.
Pick up 2(C) beads and go
through the middle (C) bead in the next group of 3 around. Repeat five more
times adding a total of six groups of 2(C) beads. Keep the thread tension loose
and pop the chaton in – pointy side down. Tighten the thread and repeat the
thread path to tighten. Step up by working through your beadwork to exit from
one of the pairs of 2(B) beads between the half-tilas.
6.
Pick up 3(B), and go through
the next 2(B) beads, skipping the (A) bead. Repeat this five more times, adding
a total of six groups of 3(B) beads. Step up by exiting from the first (B) bead
added at the beginning of this step.
7.
Pick up 3(B), skip 1(B) and go
down through the third (B) from step 6. Repeat this five more times, adding a
total of six groups of 3(B) beads. Weave in and tie off the threads. Repeat
steps 1-7 to make 3 flowers – leaving a
long working thread attached to the last flower to construct the rest of the
necklace.
8.
With your thread exiting from
the middle bead of one petal, pick up 1(E), 1(F), 1(B), 2(F), 1(B), 1(F).
Thread back through 1(F), 1(B), 1(F) to form a loop, pick up 1(E) and then go
through the middle (B) of one petal on a second flower. Weave through 14 (B)
beads on the second flower so that your thread is exiting the middle (B) bead
of the next but one petal (see diagram).
9.
Pick up 1(E), 1(F), 1(B), 2(F),
1(B), 1(F). Thread back through 1(F), 1(B), 1(F) to form a loop, pick up 1(E)
and then go through the middle (B) of one petal on a third flower. Go back
through 1(E), 1(F), 1(B), 1(F), 1(E), the 15(B) beads in the bottom petals of
middle flower 1(E), 1(F), 1(B), 1(F), 1(E) and 15(B) in the bottom of the first
flower.
10. We will make the loop to add the chain: Pick up 1(B), 1(F), 1(B),
11(C), go back down through 1(B), pick up 1(F), 1(B) and go through the middle
(B) on the next petal.
11. Go through 15(B) along the top of the first flower, pick up 1(G), go
through the 1(C) in the group of crystals between the flowers, pick up 1(G), go
through the middle (B) in the petal on the second flower, opposite. Repeat this
to add a pair of (G) beads between the second and third flowers and weave
through the petals on the top of the third flower so that your thread is
exiting the (B) bead marked with an arrow.
12. We will make the loop to add the chain: Pick up 1(B), 1(F), 1(B),
11(C), go back down through 1(B), pick up 1(F), 1(B) and go through the middle
(B) on the next petal. Step up so that your thread is exiting from the (B) bead
marked with an arrow.
13. Pick up 1(C), 1(G), 1(C), 1(H)- through the narrow end, 1(C), 1(G),
1(C). Pass through the middle (B) in the top petal of the middle flower. Pick
up 1(C), 1(G), 1(C), 1(H)- through the narrow end, 1(C), 1(G), 1(C) and pass
through the middle (B) in top petal of the first flower.
14. Make a half-hitch knot and bead back through the middle (B) of the
top petal (changing the direction you are beading in) and bead through 6(B)
beads, exiting from the (B) before the middle (B) of a petal. Pick up 2(B), go
through the bottom hole of the (H) bead, pick up 2(B). Bead through the middle
flower to exit from the opposite petal, pick up 2(B), go through the bottom
hole of the (H) bead, pick up 2(B) and go through the (B) next to the middle
(B) of the petal on the third flower. Weave in and trim your thread ends.
15. Add a length of chain and a clasp to each end of your beadwork.
Adding 7.5” of chain on each end should give an necklace approximately 18” in
length.
I'd love to see what you make using this design - feel free to tag me in your pictures on Instagram @BeadsByBecs or using the hashtag #BeadsByBecs


.jpg)


